

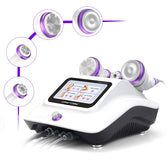
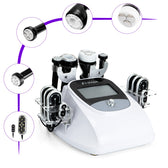

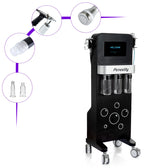

If you've recently added an S-Shape device to your salon or are considering buying one, you may already know that it combines multiple technologies in a single system. Understanding its features, however, is different from knowing how to use it on different areas of the body.
This guide outlines treatment protocols for the abdomen, upper arms, thighs, and double chin, including device settings, treatment steps, session frequency, and expected timelines.
Understanding S-Shape Treatment Fundamentals
Before exploring the protocols for each area, let's review the four technologies described in this guide:
- Cavitation: Uses ultrasound energy in body-contouring treatments.
- Radiofrequency: Uses heat to support skin-firming treatments.
- Vacuum suction: Uses suction to massage the treatment area.
- Laser lipolysis: Uses low-level laser pads in non-invasive body-contouring treatments.
Proper preparation and the treatment sequence are important. Available functions and operating instructions vary by model, so confirm that each protocol is appropriate for your device before use.
S-Shape Treatment Protocol for the Abdomen
The abdomen is a common treatment area. Abdominal treatments focus on subcutaneous fat around the stomach and waist, including the areas commonly called love handles.
Preparation Before Treatment
- Clean the treatment area to remove oil and product residue.
- Measure and record waist circumference to track changes over time.
- Review the client's health history and check the device manufacturer's contraindications before treatment.
Step-by-Step Treatment
- Apply ultrasound gel: Spread the recommended coupling gel evenly over the abdomen to maintain contact between the probe and skin.
- Cavitation (10–15 minutes): Begin with circular movements over the lower abdomen. Move clockwise around the navel, then use upward, diagonal strokes along the sides of the waist. Start at a low energy level and adjust within the manufacturer's instructions.
- Remove the gel and apply the medium recommended for the vacuum RF handle.
- Radiofrequency + vacuum suction (10 minutes): Switch to the vacuum RF handle. Move it slowly and continuously over the abdomen, focusing on the intended treatment areas.
- Remove any remaining treatment medium.
- Low-level laser treatment (20 minutes): Position the laser pads on the abdomen and secure them with the supplied bands.
Recommended Settings & Session Frequency
| Parameter | Setting |
|---|---|
| Cavitation energy level | Start at level 3 or 4 and adjust within the manufacturer's instructions. |
| Vacuum suction intensity | Low to medium, adjusted to individual tolerance. |
| Total session duration | 40–50 minutes |
| Treatment frequency | Twice a week |
| Recommended number of sessions | 8–12 sessions |
The schedule described here uses two sessions per week, with at least three days between treatments on the same area. Confirm the appropriate interval for your device and client rather than treating this schedule as a universal protocol.
S-Shape Treatment Protocol for the Upper Arms
Upper-arm treatments focus on the triceps area and skin firmness. This area requires careful technique and settings appropriate to the client's tissue and the device being used.
Treatment Steps & Techniques
- Cavitation (5–8 minutes per arm): Move the probe upward from the elbow toward the upper arm, focusing on the triceps area. Follow the manufacturer's guidance on areas to avoid.
- Radiofrequency (5 minutes per arm): Move the handle in circles over the treatment area. Avoid bony prominences, including the elbows and shoulder joints.
- Low-level laser treatment (20 minutes): Place a laser pad on the back of each upper arm and secure it with a supplied band.
Settings & Frequency
| Parameter | Setting |
|---|---|
| Cavitation energy level | Levels 2–3 |
| Radiofrequency energy level | Levels 2–3 |
| Total session duration | 40–50 minutes |
| Treatment frequency | Twice a week |
| Recommended number of sessions | 6–10 sessions |
The goal is to improve upper-arm contour and skin firmness. Changes may develop gradually over a course of treatment, but the timing and extent of results vary between clients.
S-Shape Treatment Protocol for the Thighs & Cellulite
Thigh treatments focus on the inner and outer thighs and the appearance of cellulite. The sequence outlined below begins with cavitation, followed by vacuum RF. Check the device manual before combining these functions.
Treatment Steps & Techniques
- Cavitation (10 minutes): Use controlled vertical movements over the inner thighs and circular movements over the outer thighs. Keep the probe moving steadily and follow the device's operating instructions.
- Vacuum radiofrequency (10–15 minutes): Move the handle slowly upward along the thigh. Avoid holding the suction handle in one position for prolonged periods.
Settings & Frequency
| Parameter | Setting |
|---|---|
| Cavitation energy level | Levels 3–5 |
| Vacuum RF intensity (confirm the specific control in your device manual) | Medium to high |
| Treatment duration per thigh | 15–20 minutes |
| Treatment frequency | Twice a week |
| Recommended number of sessions | 8–12 sessions |
S-Shape Treatment for the Double Chin & Face
Facial treatment requires a different approach from body treatment. Do not assume that a body cavitation probe is suitable for the face. Use only a facial handle and treatment mode specifically approved for the intended area in your device's instructions.
Treatment Steps
- Cleanse the skin: Remove makeup and thoroughly cleanse the treatment area.
- Apply conductive gel: Use the gel specified for the facial handle.
- EMS + electroporation mode (5–8 minutes): If your model supports this treatment in the intended area, follow its prescribed movements and settings. Use RF along the jawline only if the manufacturer approves that mode and application.
Facial Treatment Safety Precautions
- Avoid the thyroid area at the front of the neck.
- Avoid the eye area.
- Start at the lowest permitted energy level and adjust only as directed by the device manual.
- The protocol described here limits facial treatment to 10 minutes; follow any stricter limits specified for your device.
Results Timeline & Progress Tracking
Use consistent measurements and photographs to assess progress rather than promising a fixed outcome after a specific number of sessions.
Sessions 1–3: Early Assessment
- Record any changes in circumference under consistent measurement conditions.
- Note changes in how the skin looks and feels.
- Do not interpret an immediate change in circumference as proof of lasting fat reduction.
Sessions 4–8: Review Progress
- Compare current measurements with the baseline to assess changes over successive sessions.
- Review any changes in the appearance of cellulite, especially on the thighs.
- Take photographs using the same lighting, pose, distance, and camera angle.
Sessions 8–12: Evaluate the Treatment Course
- Compare final measurements and photographs with the baseline.
- Review changes in contour and the appearance of skin firmness.
- Discuss whether further treatment is appropriate, based on the client's response and the device manufacturer's guidance.
Taking photographs at sessions 1, 4, 8, and 12 can help document progress. The treatment courses described above range from 6–12 sessions depending on the area. Any maintenance schedule should be tailored to the client and the device.
Important reminder: Results vary between clients. The settings and timings in this guide have not been verified against a specific device manual and are not a substitute for manufacturer instructions or professional training. Specific circumference-reduction claims require supporting evidence and should not be presented as guaranteed results.
Pre- & Post-Treatment Care Checklist
Before Treatment
- Follow the hydration guidance appropriate to the client's health needs.
- Follow the provider's instructions about eating before treatment.
- Take baseline photographs and record circumference measurements.
- Keep the treatment area clean and free of product residue.
- Review contraindications and confirm that the client is suitable for treatment.
After Treatment
- Follow the device manufacturer's and treatment provider's aftercare instructions.
- Maintain a balanced diet and appropriate hydration.
- Confirm any restrictions on alcohol, exercise, saunas, and hot baths with the treatment provider.
- Report persistent pain, burns, or other unexpected symptoms and seek appropriate medical advice.
Clear aftercare instructions help clients understand what to expect and when to seek help. Avoid promising that a particular diet, water intake, or exercise routine will guarantee treatment results.
FAQ
How often can I have S-Shape cavitation treatments?
The body-treatment schedules outlined here use two sessions per week, with at least three days between treatments on the same area. The appropriate interval depends on your device and the client's suitability, so follow the manufacturer's guidance.
Can multiple body areas be treated in one session?
This depends on the device's permitted treatment areas, maximum operating time, and the client's suitability. Do not combine protocols or extend session times without checking the manufacturer's instructions.
What should I avoid after cavitation treatment?
Follow the aftercare instructions supplied by your treatment provider and device manufacturer. Ask specifically about alcohol, exercise, heat exposure, and any skin reactions that require attention.
Conclusion
A clear treatment plan starts with client screening, model-specific settings, and correct technique. Use consistent measurements to track progress, provide clear aftercare instructions, and adjust the plan according to the client's response and the manufacturer's guidance.
To explore available equipment, visit Surebeauty S Shape Cavitation Machine Collection.


0 comments